|
|
Printronix P5000 Printer Technical Note 5-0007 Rev A |
|
475 and
500 LPM Shuttle Replacement and Setup |
|
Summary:
To provide installation
instructions and reminders when installing a replacement 475 or
500 LPM shuttle assembly or when replacing the CMX controller
board in the P5000 Series printers. |
|
Resolution:
|
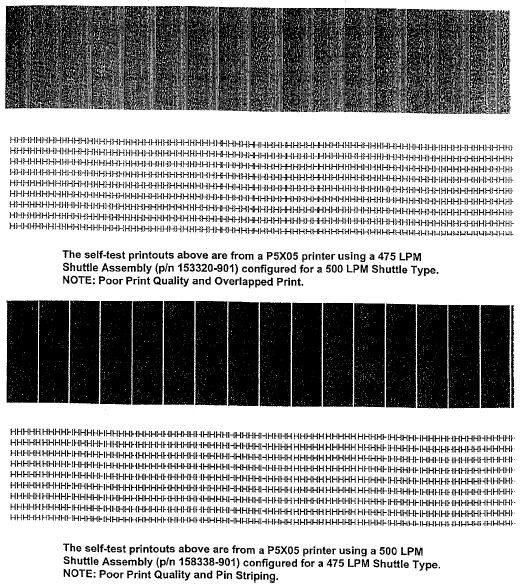
On 475 and 500 LPM printers, you must
set the shuttle speed if you replace the CMX controller
board and/or the shuttle frame assembly. Do not do this
procedure if the printer’s original CMX board or shuttle
assembly was removed and reinstalled as part of other
maintenance tasks.
You must follow the installation
procedures in the printer field service maintenance manual
to correctly install the CMX controller board or the
shuttle assembly. Failure to follow the procedures in the
maintenance manual can result in damage to the equipment
or degraded printer operation.
DO NOT ADD OR OMIT ANY STEPS FROM THIS
INSTRUCTION. You will be in the Development Menu,
which is used when the printer is manufactured. DO NOT
CHANGE ANY OTHER PARAMETERS IN THE DEVELOPMENT MENU or
you may render the printer nonfunctional.
Procedure
- Install the new CMX Controller Board and/or Shuttle
Frame Assembly according to the installation instructions
in the Maintenance Manual.
IMPORTANT: If the CMX controller board is replaced,
you must load flash memory again. Installing the flash
memory SIMM’s from the old board onto the new board may
not transfer all operating system software.
- Power on the printer.
- If the printer is online, press the ON LINE key
to place the printer offline. "OFFLINE/CONFIG. CONTROL"
displays.
- On the control panel, press the + ¯ keys to
unlock the ENTER key. "ENTER SWITCH UNLOCKED"
briefly displays. (This is the default key combination.
The lock/unlock key combination can be programmed by the
user. If + ¯ does not unlock ENTER, get the
combination from the user.
- Press the +
¯ + ® + ¬ keys simultaneously to enter the
development menu. "Development / Clear NVM" appears on the
display.
- Press the ® key until "Development / P5205 type"
appears on the display.
- Press the ¯ key. "P5205 type / 475*" or "P5205 type /
500*" appears on the display. The asterisk [*] indicates
which shuttle speed is currently active.
- Press ® key until
the shuttle speed you want appears on the display.
- Press the ENTER key. An asterisk
[*] appears next to the selection, indicating it is now
the active shuttle speed.
- Press the ON LINE key to exit
the development menu.
- Press the
+
¯ keys to lock the ENTER
key. (Or use the key combination programmed by the user.)
"ENTER SWITCH LOCKED" briefly displays.
- Cycle printer power to activate
the shuttle speed setting. (Set the power switch to O,
wait 15 seconds, then set the power switch to 1.)
- Adjust the hammer phasing. (Refer to
the Maintenance Manual.)
- Adjust the paper out distance. (Refer
to the Maintenance Manual.)
- If the printer is online, press the
ON LINE key to place the printer offline. "OFFLINE /
CONFIG. CONTROL" displays.
- Press PRT CONFIG, then press
ENTER. Verify that the configuration printout shows
the correct SHUTTLE TYPE. If the shuttle type is
incorrect, return to step 3 and do this procedure again.
- Return the printer to normal operation.
(Refer to the Maintenance Manual.)

|
|
|
|
Need help? Call our
knowledgeable sales staff at:
1-800-243-3338
|
|
